Compost and Composting Resources
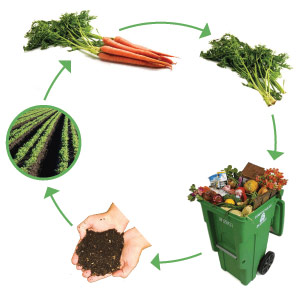
Composting is controlling the natural decay of organic matter by providing the right conditions for composting critters to convert yard trimmings into a product that can be returned to your landscape and garden. Tiny organisms (mainly bacteria, fungi and protozoa) break down garden and landscape trimmings in a moist, aerobic (oxygen-demanding) environment. The final product is a dark, crumbly form of decomposed organic matter.
Compost improves your soil. When added to soil, compost breaks up heavy clay soils, helps sandy soils retain water and nutrients, and releases essential nutrients. Compost also contains beneficial microscopic organisms that build up the soil and make nutrients available to plants. Improving your soil is the first step towards growing healthy plants.
What Can Be Composted?
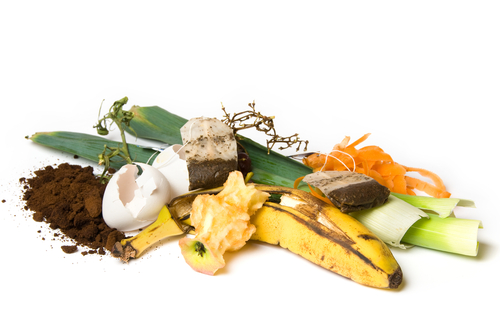
Any natural organic material can be composted. Organic trimmings in your landscape, such as grass clippings, weeds, fallen leaves, pine needles, hedge clippings, straw, livestock manures, flowers and remains of garden plants make excellent compost. Also, many manufactured organic materials that are not waxed or plastic-coated, such as newspapers, paper boxes, clothing scraps and wood shavings are compostable and may be used.
Compost made from grass clippings treated with herbicides or any other pesticides is not recommended for use in vegetable gardens. Kitchen scraps, such as fruit and vegetable peels and trimmings, crushed eggshells, tea bags, and coffee grounds and filters can also be composted. Woody yard trimmings can be run through a shredder before adding to the compost pile. Sawdust may be added in moderate amounts if additional nitrogen is applied. Add a pound of actual nitrogen per 100 pounds of dry sawdust.
What Materials Should I Avoid Adding to my Compost Pile?
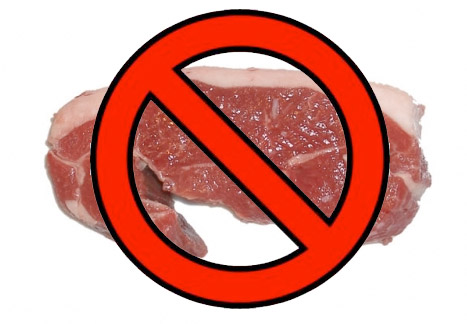
Organic materials that should not be added to your compost pile include meat, bones and fatty foods (such as cheese, salad dressing and leftover cooking oil). Do not add pet or human wastes to a compost pile.
Weeds that have not gone to seed can be added to the compost pile. Weeds with large storage roots like nutsedge, Florida betony or greenbrier should be left out and dried in the sun before composting to reduce their chances of survival.
The high levels of heat produced in the center of the compost pile can kill many pests, such as weeds with seeds and diseased or insect-infested plants. However, it is very difficult to mix the contents thoroughly enough to bring all the wastes to the center, so some disease organisms may be returned to the garden with the compost.
"Essentials" Of Composting
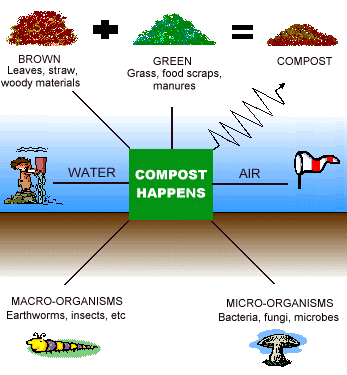
Organic materials for composting all contain nutrients that provide energy and growth for microorganisms. These organic materials each have their own ratio of carbon to nitrogen (C:N) in their tissues (Table 1). These C:N ratios are important because the tiny decomposers need about 1 part of nitrogen for every 30 parts of carbon in the organic material. If the ratio is greater than 30:1, nitrogen will be lacking and materials will decompose more slowly.
Leaves, straw and sawdust are high in carbon, while grass clippings, manure and vegetable scraps are higher in nitrogen. It helps to think of these materials as greens and browns. Greens, such as grass clippings, are high in nitrogen. Browns, such as leaves or sawdust, contain high amounts of carbon.
Get tips for composting fall leaves.
Be aware that anything organic will decay (as long as it is organic, the critters will eat it); however, it may take a long time to make compost when the C:N ratio is too high. For example, a pile made solely of sawdust will take years to decay. Adding more greens, such as grass clippings or vegetable scraps, will speed up decay and produce compost in less time. Experiment to find the right combination of materials for your compost pile.
Air and Moisture are Important
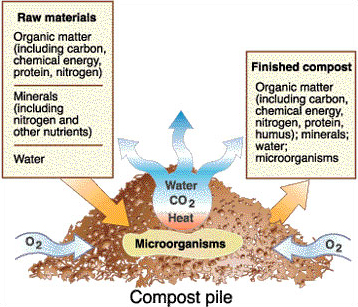
The composting process is an aerobic process; decomposition needs air or oxygen to occur. When the compost pile is lacking in oxygen, decomposition slows and odors occur. Add air to the pile by mixing, turning, stirring, fluffing or using air stacks (pipes with holes) in the pile.
Adequate moisture is essential for microbial activity that is responsible for decomposition. A dry compost pile will decompose slowly. Proper moisture encourages the growth of microorganisms that break down the organic matter into humus. If rainfall is limited, water the pile periodically to maintain a steady decomposition rate. Add enough water so the pile is damp but not soggy. A rule of thumb is "about as wet as a wrung out sponge." Avoid over watering. During rainy periods, you may need to cover the pile. Excess water can lead to an anaerobic (lack of oxygen) condition which slows the decomposition process and causes to odors. If the pile should become too wet, turn it to dry it out, or add dry carbon materials to the pile.
What is the C:N Ratio and Why is it Important?
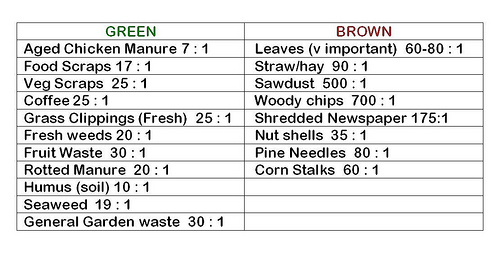
The carbon to nitrogen ratio (C:N ratio) is the relative percentage of carbon to that of nitrogen in various organic materials. Decomposing microbes are the most active and efficient when the C:N ratio is 30:1. The more carbon in the pile relative to nitrogen, the longer the decomposition process takes. Excess nitrogen causes the pile to lose nitrogen to the atmosphere as ammonia gas.
Carbon materials are usually dry and brown (examples: straw, paper, fall leaves, & hay).
Nitrogen materials are usually green and wet (examples: grass clippings, freshly pulled plants, fruit & vegetable kitchen scraps, and coffee grounds.) When no nitrogen materials are available, fertilizer can be used to provide the nitrogen if desired. Apply one cup of fertilizer, such as 13-13-13, for every 10 square feet of pile surface area. This could be applied again each time you add another 6 inches of high carbon material.
A rule of thumb on C:N ratio is about ¼ - ½ of the pile volume nitrogen materials and ½ - ¾ carbon materials.
Benefits of Composting
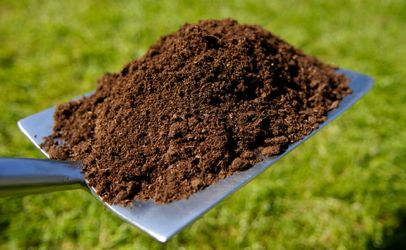
Compost improves the structure of the soil by adding organic matter. In sandy soil, compost holds moisture and helps to hold soil together. In heavy clay soil, compost particles bind with clay particles to form larger particles.
Compost attracts earthworms. Worm tunnels aerate the soil, improve drainage and bring up minerals from the subsoil. Earthworm activity contributes to good soil structure.
Compost is a soil conditioner. It releases small amounts of plant nutrients and essential trace elements slowly throughout the growing season. It also helps latch onto nutrients added in the form of fertilizer and prevents them from leaching out of the soil. Some chemical fertilizers release elements so quickly that rain can leach them away before plants derive much benefit.
Compost improves soil health. Compost has been shown in some research trials to reduce plant diseases; suppressing or controlling some soil-borne plant pathogens.
Avoid Using Compost Before It Is Ready
How do I know when the compost is ready to use? Compost is finished when the original organic materials are no longer recognizable and it is no longer generating a significant amount of heat. Finished compost should have a dark, crumbly appearance and an earthy odor.
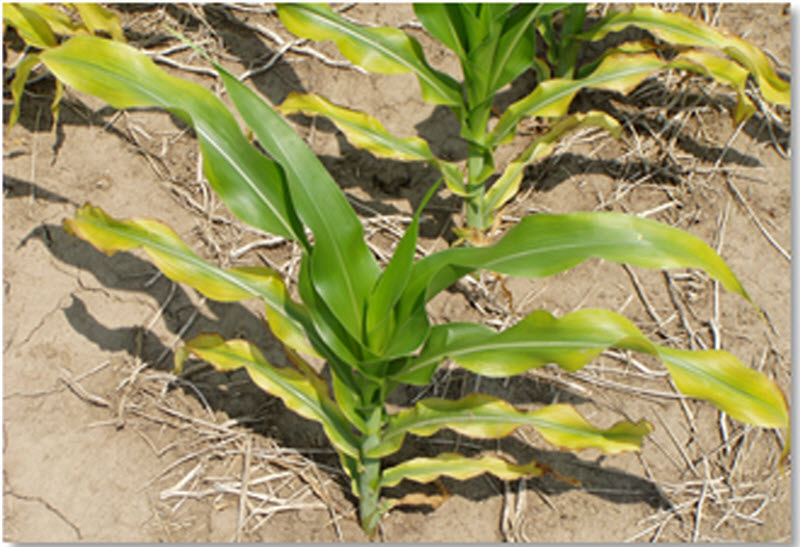
You may be tempted to use compost as a soil conditioner before it is ready. If the organic materials have not completely decomposed, plants growing in the amended soil may turn yellow and appear stressed. As the decomposition process continues near plant roots, soil micro-organisms compete with plants for nitrogen. Organic acids in immature compost may also be harmful to plant roots.
Detailed information on composting is available in these Cooperative Extension Service fact sheets:
Understanding the Composting Process - FSA 6036
Worm Composting
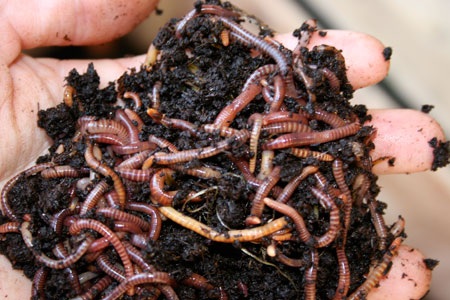
Worm composting or vermicomposting is a great way to compost food scraps. It is suitable for apartment dwellers, homeowners and a great classroom activity.
Worm bins can be made from plastic tubs by drilling air holes in the tub. Plastic tub bins tend to get wetter than wooden bins. If the bin is too wet, odor problems occur and worms die or leave the bin. Holes can be drilled in the bottom of the tub. Set the bin on wooden blocks or attach legs to the tub to increase circulation. Worm bins can also be built from plywood; see the Cooperative Extension Service fact sheet for building plans.
Check out our featured article about how to get started with worm composting from agent Sherrie Sanders.
Worm Composting Bins - FSA 6032
To Bin or Not to Bin?
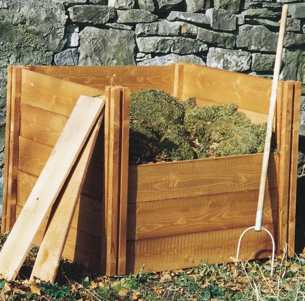
Compost can be made in piles, homemade bins or manufactured bins. The size of the bin or pile should be at least 1 cubic yard or 3' x 3' x 3'. A number of manufactured compost bins are available at hardware stores, garden suppliers, and on the internet. Many communities sponsor "Compost Bin Sales Events, so check with your public works or solid waste department.
A series of Cooperative Extension Service fact sheets are available to help build a bin.
Wooden Pallet and Wire - Mesh Compost Bins - FSA 6031
Wood and Wire Three-Bin Turning Compost Bin - FSA 6033
Three-Bin Turning Compost Bins - FSA 6030
Fast Compost/Tumblers
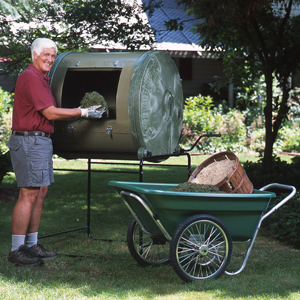
"Fast" Compost Recipe: This method can produce compost in a couple of months or less but is labor-intensive and requires frequent turning. Start your pile with a layer of browns, and then add a layer of greens. If the greens are not fresh, sprinkle in some blood meal or cottonseed meal, poultry manure, or other nitrogen source. Mix well and add water if necessary to moisten. Adding a layer of garden soil, old compost or manure to each brown-green layer will introduce more critters to speed up the process.
Continue adding and mixing layers of greens and browns until you either fill the bin or run out of materials. Slant the top of the pile to the center to catch rainfall. You may want to cover the pile with a plastic covering or tarp to regulate the amount of moisture entering your pile. The cover should not rest on the pile because it may cut off oxygen.
Periodically, check the moisture content of your pile. The compost should feel damp. Check the interior temperature of your pile and when the temperature reaches 140 °F or begins to fall, it is time to turn the pile. You will need to turn your pile every three to five days. Once your turning causes no rise in temperature, and the material appears dark and crumbly, your compost is ready.
Manufactured tumblers will provide the environment to create compost in a short period of time. Detailed information on tumblers is available in this Cooperative Extension Service fact sheet: