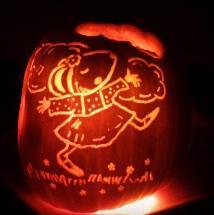
Pro Tips for Carving Spooky Pumpkins
Pro Tips for Carving Spooky Pumpkins
Carving pumpkins can be an inexpensive family activity that will make memories to last your children (and yourself) a lifetime!
I consider myself a bit of a semi-professional pumpkin carver and with Spooky Season upon us, I thought I would share some of my pro tips for carving awesome pumpkins.
PRO TIP #1
Cut out the bottom. Instead of cutting the top off and risk losing it, cut the bottom off and throw it away. Can't fit your hand and spoon in the pumpkin? Make the hole bigger! The best part is that you can make the hole in the bottom as big as you need.

PRO TIP #2
Use a large metal spoon to scrape sides. Make the sides as thin as you can, especially the side you are going to carve. This will make carving the pumpkin much easier.
PRO TIP #3
Use toothpicks to hold your design in place. Pull the paper in every direction and place a toothpick to hold the template tight.
PRO TIP #4
Use a sharp knife or toothpicks to outline design. Go around the edge of the template with a sharp knife or toothpicks. There is no need to draw every line but enough to give direction. Make sure to define the edges and corners for easier carving.
PRO TIP #5
Don’t be afraid to use power tools. You can use a Dremel or a drill to assist in making outline. Then use the Dremel to

PRO TIP #6
Use small sharp knives to carve. I know the kits at the grocery store look appealing but the dull knives that come with the kits are hard to use. Using a sharp knife can even be safer that a dull one because not as much force is needed. To make it easier, separate the carving into smaller sections.
PRO TIP #7
Check your self. It’s not in the video but use a flashlight and a dark space to make sure your pumpkin carving is defined enough on the fully carved parts and deep enough on the partial parts.
PRO TIP #8
Seal your pumpkin using petroleum jelly. Make sure to put it on all the open flesh of the pumpkin. This will help keep the pumpkin from decaying as quickly.
Carving pumpkins is my favorite thing to do every fall! I can't wait to share this special experience with my children one day! If you have tips of your own or you want to share your pumpkin carvings, email me or share with me on my Facebook Page.
To watch my pro tips in action, watch the video on my Facebook Page!