Horsemanship

The Extension Horse Program offers any number of levels of horsemanship skill development for youth and adults.
There a wide variety of topics available. They are hands-on in nature and will often involve guest speakers, depending on content.
- General Horsemanship
- Speed Events
- Roping
- Working Cow Horse
- Ranch Horse
- Ranch Cutting
- Western Pleasure
- Showmanship
- Colt Breaking
- Yearling Sale Prep
- Ground work for Young and Older Horses
- General Show Prep
- Reining
- Search and Rescue Team Training
- Mounted Patrol and Security
- Dressage
More Infromation Relating to Horsemanship
Tack (saddles, bridles, halters, etc.) represents a large investment for most horse owners. Proper care can prolong the useful life and the appearance of tack and can prevent injuries resulting from broken or poorly fitting tack. Dr. Cindy McCall of Auburn University lays out some tips to follow when preparing for time away from riding:
- Saddles, bridles, halters and blankets should be checked for fit in the fall (and periodically throughout the year) because the horse's body shape and size will change as it gets older or as its level of fitness changes. A thorough safety check should be made on all tack, especially before use. Areas where leather meets metal, such as around metal buckles or fasteners, and stress points such as girths, cinches, stirrups and reins, should be inspected closely. Worn, cracked or rotten areas and broken or weak stitching are definite signs that the tack needs to be repaired or replaced. While it’s often most convenient to hang a halter on the gate to the pasture, this can also cause the material to weaken and/or get stiff.
- Before storage, leather tack should be thoroughly cleaned and conditioned to prevent damage from dirt, sweat, mildew or dryness. To properly clean leather, use a glycerinbased soap or a saddle soap that is at least fifty percent fat. Because dampness damages leather, use a minimum of water for cleaning.
- Squeeze all excess water out of the sponge or cleaning rag, wipe it over the soap without working up a lather and apply the soap to the tack. Work the soap into the leather paying particular attention to sweaty and dirty areas. The small, greasy dirt globules that form on tack (called jockeys) may have to be gently scrapped off with a knife or fingernail. Allow 1 tack to dry naturally. Applying heat or setting the saddle in the sun draws oils from the leather resulting in cracking and breaking of the leather fibers. After the leather has dried, apply a conditioner. Conditioners should be rubbed into the leather until a shine comes to the surface of the leather. Conditioners should be mostly animal fats, such as lanolin. Petroleum-based products can damage vegetable-tanned leather and weaken the stitching on the tack. Neat's foot oil is a traditional conditioner made from the bones and hooves of cattle, but it will darken the leather.
- After conditioning, leather should be covered with a fabric cover so that it can breathe and stored in dry, cool environment. Attics are generally too hot and basements are generally too damp for ideal leather storage. The storage area should also be free of insects and rodents. Leather should be periodically checked and reconditioned if stored a long time. Leather strapping such as stirrup leathers, bridles and reins should be unassembled and stored flat. Saddles should be stored on a saddle rack.
Horsemen who ride throughout the year will not need to worry about storing their tack for the winter. However, they still need to make routine fit and safety checks on their tack, and they should clean and condition it periodically. A tip for busy riders is to use a combination cleaner-conditioner for tack for frequent cleanings and then use the traditional cleaning and conditioning procedure for major cleanups. There are several combination leather cleanerconditioners on the market, or they are easy to make by melting a bar of glycerin saddle soap in a saucepan over low heat on the stove, then adding approximately one pint of a leather conditioner and one to two tablespoons of vegetable oil. Mix these ingredients thoroughly and pour into a plastic container with a tight fitting lid. As the mixture cools it will solidify into a soap-like consistency. It is applied to the leather with a damp sponge or cloth like saddle soap.
Getting your horse halter broke can and probably should be the very first type of training you do with your horse. In reality, it can start the first week or so they are on the ground. However, you don’t want to leave the halter on the baby all the time due to safety concerns. With a halter on, your foal (or grown horse for that matter) takes the risk of getting caught on objects in the pasture or paddock. If it were to get caught on something, much damage can be done in a hurry, causing serious injury or death.
First and foremost, most halter breaking sessions for young or older horses does not need to last for more than 10 to 15 minutes at a time. Here are some other considerations:
- The longer you work with them, the greater their stress levels. Shorter amounts of time achieved on a consistent basis has proven to be easier on the horse both mentally and physically.
- Train in an area that is comfortable for the horse. If you are halter breaking a foal that hasn’t been weaned, the best location is most often a stall.
- If the horse you are wanting to halter break is older and/or won’t allow you to just walk up to them and touch them, take your time by making contact with them in small intervals. It is also best to not rope them. The younger the horse, the easier it will be to gain their trust. If possible, start making contact with your foal as soon as possible. If you wait till they are weaned, your own safety becomes a greater concern as the horse gets older.
- Begin the training session by rubbing on their head and neck. If you cannot successfully rub their poll and ears, getting a halter on them will be very tough. Take your time, there will always be “next time.” After you can successfully rub their ears and poll for several minutes for a few days in a row, use the lead rope next. Complete the same tasks, only this time use the rope instead of your rope. Finally, use the halter to make contact. If your horse stands quietly and patiently, proceed to putting the halter on their head. The first few times you put the halter on, don’t worry about leading them. Put it on and take it off several times. This part should be mastered before attempting anything more advanced.
- You should now begin to think about leading. Start by simply flexing your horse to each side. The moment they flex and give their head to the pressure, you should release. Repeat this process several times. If your horse moves while flexing, that is certainly ok. Allow them to move freely during this process without pulling on the lead rope too much.
- After a few sessions of flexing and comfortably putting the halter on and taking it off, you should begin to ask for some type of motion with their legs. If there is any type of resistance from the horse or pulling back at this point, take a few steps back in the process and create more trust. If there is no resistance and your horse is listening, feel free to advance to asking for motion from your horse. You are simply taking the flexing part of the previous exercise and asking for more movement when you pull to the side. Any small step is good and should be rewarded. The first few times you ask for a step, be sure to emphasize the reward. The end goal of teaching a horse to lead in this manner is be able to walk you horse in a circle with ease and slowly make that circle bigger and bigger over time to the point that you are eventually walking in a straight line.
Utilizing a round pen is ideal, but not completely necessary. In fact, much of it can be done in a stall or turnout pen, where he feels comfortable and is less like to spook or shy away because of unfamiliar areas.
- Is he halter broke? He must be halter broke. If he’s not, spend as much one on one time as you can with him. In doing so, you are developing a trust and comfort level, without stressing him out or asking too much at once. The horse really doesn’t need to be haltered until you can rub and pet all over him. If he’s already halter broke, you can skip this step.
- Pick up their feet. Start by running your hand down his legs over and over. If you can’t comfortably touch his legs, picking them up will be very difficult. Working with their feet only makes them more comfortable with you and adds a little more “training” to them.
- Sack out. I like to sack out all my horses, whether they’re young or old. I’ll take an empty feed sack and twist one end to make a handle. The point of the sack is that it makes more noise than anything else. I like to hit my own leg with it the first few times we use it. When I feel like they have passed the noise and motion test, I’ll start down low on their legs and tap a few times. Generally, they’ll move around a little, which is not a big deal. As he gets more comfortable, I may move up his leg some. The end result is a horse that is comfortable with the noise and movement of the feed sack from head to toe. Keep in mind that you’re not slapping the horse with it, just merely brushing and possibly tapping the horse with it and getting him used to noise and pressure coming from different directions from a source they may not recognize.
- Utilize a longe line. This is another great way to teach your horse to move away from pressure. Begin with your lead rope and move his hind end around. Release pressure when he moves his legs. The more forward he moves, the lighter you should be with your hands and pressure to move him. Just like other exercises, start small and reward.
- Saddle pads. Spend time putting a saddle pad on your horse’s back and moving forward and backward up his neck and down his rump. Too often I see someone attempting to saddle an unbroke horse and they can’t comfortably put a saddle pad on them. The saddle is really tough to get on their back if you can’t get the saddle pad on easily.
- Use lead rope to pressure around the girth area. It’s a good idea to get your horse used to pressure around his girth area before tightening the girth on the saddle. A lead rope can be used by going over their back and underneath around the heart girth. It doesn’t need to be fastened or tied, just tightened up with your hand. This allows them to get used to pressure in that area without having to commit to tightening the saddle and securing it to them before they’re ready.
- Saddle. If you can sack them out and put the saddle pad on them and he stands comfortable with his head down, move to the saddle next. Slowly place it on their back. Let the saddle sit on his back for a few moments, then take off. Repeat a couple more times the first day, and then call it good. As times goes on, leave the saddle on a little longer each time. It’s also good practice to saddle and unsaddle from both sides. Over time, you should be able to tighten the girth. Make sure that if you do decide to tighten the girth, that it really is tight. If he decides to bolt or buck, you don’t want the saddle slipping up their neck or twisting underneath them.
If you haven’t mastered all of these different activities, it probably isn’t time to get on quite yet. Take your time during the process. There will always be another day. It’s much easier to go forward without having to make up damage that was done. It should also be noted, these aren’t listed in any particular order (with the exception of being halter broke and putting the saddle on), just simply a list of possible activities you can do with your horse to get him ready to ride.
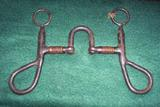
The bit that we choose should be a direct reflection of the level of our horse, the event/activity we participate in, and the level we are at as horsemen.
Unfortunately, I have found that the more we rely on the bit we are using, the more we stray away from true harmony with our horse. Having a bit with long shanks combined with a high port doesn’t make our horse more broke. What it can do, in turn, is add a certain amount of polish on a “finished” horse. A smooth snaffle bit can cause just as much damage as a correction bit if in the wrong hands. Likewise, a correction bit can be just as mild as smooth snaffle when used correctly. That being said, when riding at home, most of my time is spent riding in a snaffle bit.
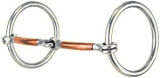
The advantages of using a snaffle bit are many. But before we advance to the snaffle bit, the horse should flexing in the halter. One of the first things I teach a horse before I even throw a leg over him is to give to pressure. This can be done as early as their yearling year. Stand at either side of your horse (horse should be haltered) with lead rope in hand. Slowly pull his head to the side you are standing. As soon as he gives to the pressure, give back. Repeat 5 or 6 more times on each side of the horse. Once the horse gets closer to being two years old, or has passed his two year old year and has mastered flexing with the halter only, you can now begin to think about putting a smooth snaffle bit in his mouth and flexing him with that. It is a good idea to let him stand tied in 15 minute increments with the bit in his mouth. This will require very little from him the first time you put the bridle on him and will allow him to see that there is breaks. In doing so, I am giving him a chance to carry the bit and get used to it without me ever pulling on it. Once he has carried the bit for awhile, you can begin to flex him in the same manner you did with the halter. The best benefit of this exercise is that he can get more and more used to the bit without having to be saddled, thus avoiding any added stress. If you ride with me long enough, you will find that one of my goals around horses is to keep their stress level down as much as possible.
One of the main advantages of having this head start with your horse will be that you will have much more control over him when you decide to begin the breaking process. I tell many of my students that they will have much more control of their horse when they begin to break their horse if they have spent some time flexing him first. After you get on for the first time and your horse acts as though he’s going to pitch a fit, having the option of pulling his head to one side and walk or trot in a small circle will settle him down. However, it can’t be done if his neck isn’t soft and bending properly. I will typically keep a horse in a smooth snaffle bit his entire 2 year old year. In any bit that you use, it is acceptable to use both hands. However, when riding with a snaffle it isn’t just acceptable, it is recommended. Depending on the level of the horse after his 2 year old year, I may use a snaffle bit that has a slow twist to the mouth piece.

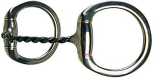
The intended purpose of a bit with a twisted mouth piece is strictly for training purposes only. It serves as a tool to “soften up” our horse’s mouth and make them more responsive…..if used responsibly and carefully. The larger the mouth piece and slower the twist, the more mild the bit will be. In turn, the smaller the mouth piece and faster/harder twist, the more severe it can quickly become. Every time I lift on my reins, no matter the type of bit, I preface with a squeeze from my legs. This is my cue to the horse that something is coming. I never want to sneak up on my horse and pull on the reins without giving a warning first. But what are some the other benefits of using legs first? When we use our legs first, we are training our horses to rely on our legs as our means of communication. We can also keep them more collected and prevent them from breaking gait. Maintain forward motion is extremely important when training horses. Horses tend to understand things when we combine our training methods with forward motion. Before we know it, our horse is dropping his head and rounding up his back, based solely on a squeeze from our legs and with very little or no contact with the bit. When we squeeze with our legs and lift with our hands, our horse should give his face and pick his back up. Some horses do it better at the walk. Some do it better at the trot or jog. Each horse has his own personality and it is up to us to figure out what that personality is, and how we can adapt our training program to that particular personality.
If we rely completely on our hands to guide our horses through a pattern or down the trail, we take a great chance of making our horses hard mouthed. The ultimate goal for everything we do on our horses should start with a soft mouth. This starts with soft and slow contact with the bit. Most people have heard of being soft with our hands, but what about being slow? What exactly do I mean by using slow contact with our hands? Being slow with our hands will slow everything down with our horse. It teaches them to be more patient and trust us much more. Horses will react to every amount of pressure we put on their reins. Depending on how much they react is entirely up to the horse. I like to do everything I can to ensure my horse remains soft; and being slow with my hands gives me more confidence that he will be soft. Horses are very much like humans, if something sneaks up on us, we are more likely to have a negative reaction. It’s the same with horses, if we sneak up to them with our hands, the reaction will be negative almost all the time.
It’s only natural to want to rely on our hands to steer our horse the direction we wish to go. The biggest aid for making a soft mouth is a horse that moves away from leg pressure. If I squeeze with my right leg, I want my horse to move to the left. Likewise, if I push with my left leg, I want my horse to move to the right. If I pull my horse to the left, I complement it with a squeeze from my right leg. When squeezing with my leg, I use my calf to do the majority of the squeezing. If using my calf isn’t enough, I will use my heel. I ride in spurs about 99% of the time, so I try to be light with my spur as much as I can. Being slow with my leg is as important as anything I do with my horse. Most of the time when I see a rider who wants to slow their horse down, it can be achieved by slowing his/her leg down. It’s amazing at how much we can make our ride more enjoyable just by slowing our legs and hands.
When turning our horse any direction, it’s important to keep the outside rein loose as much as possible. If we keep or outside rein too tight, it will cause the horse to not understand which direction to go and will ultimately cause our horse to lose any softness and suppleness it may have. Just because a horse starts off really soft, doesn’t mean he will stay that way forever. It is up the rider to maintain it.
When I’m breaking a 2 year old, I start softening them up before I get on them. This can be done by line driving. Once I’m on the colt, I will start asking them to move away from leg pressure immediately. Every little bit of effort is rewarded. One step in the correct direction is all I ask for. If I get that one step, I pat them on the neck and walk around for a minute or so, then do it again. If we reward them for each little bit of effort they put in, it will be amazing at how quick they will learn to move away from pressure. Lastly, it is equally important to look up and look the direction we wish to go. If we look down and drop our shoulder, the horse is going to drop his shoulder and knock down a barrel or cut into a circle and cheat us out of a correct maneuver. Our body will follow where our eyes take us.
One of the most important things we can teach a young horse is “whoa.” The younger we begin to teach them, the easier and less stressful it will be.
When I’m riding a young horse, one of the first things I want them to know is how to stop. There are four separate methods I use to stop a horse and to train them to stop. When all four are used together, the result is usually really good. However, this method of teaching a horse to stop reaches beyond teaching safety; it also is applicable to performance horses and extremely helpful in the working events such as reining, working cowhorse, and ranch horse events.
- Technique #1 The first method I use when I’m on a 2 yr old to teach them “whoa” is to simply say “whoa.” I will probably begin to use this method of stopping them even on the first ride. I don’t pull back, I don’t sit down. I simply say “whoa.” Many times, they won’t stop on the first, second, or third, tries. However, they eventually will stop. This is where our ground work and ground manners should come in extremely handy. The second they stop, give them a pat on the neck or some other type of reward.
- Technique #2 Once I feel like we are making some ground with saying “whoa,” I will advance to pulling back on the reins. When I pull back, especially with a young horse, I always use slow hands. For me, slow hands = soft mouth. A horse with a soft mouth is one of the most important characteristics of riding a good horse. When I pull back, I always make sure I accompany it with saying “whoa.” If nothing else, this lets the horse know that something is coming. If you’ve mastered the first technique, your horse will already stop when you say “whoa.” The pulling back is merely a bonus at this point. When I pull back, I go straight towards my belt. If my hands can extend past my belt line and the reins are still loose, I probably have too much drape in my reins. It is also in this step that I will back my horse a few steps with each back. I will back them each time I stop from this point forward in their training. The backing is what really helps them become lighter on their front end and drop more weight on their haunches. This is the pretty stop we are looking for at the show.
- Technique #3 The final two techniques are used primarily when a horse has 60-90 days of riding time. That’s not to say it can’t be used on green horses, it’s simply a method that is better for those horses that are ready to go show. At this point, I should have a horse that knows how to stop when I say “whoa,” and I pull back on the reins slowly. For the third technique, I replace the pulling back with simply sitting down in the saddle deeper. Sitting down in the saddle deeper doesn’t mean leaning back further; it is basically placing more weight down in the seat and sitting on my pockets more. If you have ever seen a reining horse stop, the rider is sitting down deeper in the saddle than they were when they were loping circles. This is the look that we are after. The reason we are sitting deeper and not leaning back as much is for the simple fact that when we sit deeper in the saddle to stop, it places more emphasis on the horse dropping his weight down into his hocks and stopping on his hind end, rather than on his front end. When I use this method, I don’t pull back, I only say “whoa” and drop down a little deeper in the saddle. I don’t pull back in this technique (you’ll see why a little later on).
- Technique #4 In the final technique/method I use when perfecting the stop is to throw my legs forward when I go to stop. Also in this technique, I am not pulling back and I am not sitting deeper, I am merely saying “whoa” and throwing my legs forward. Just like the other exercises, it must be mastered at the walk first. It is also better if these techniques are done in the round pen or in an arena to minimize distractions for the horse. I will keep asking until I get the result I was looking for. There will be some horses that enjoy stopping more than others. If I’m specifically training one for the reining, working cowhorse, or ranch horse classes, I want one that likes to stop and anticipates the next time he will be stopping. This tells me that he enjoys his job and is eager to please.
- Final Element Now, let’s add all four of those techniques together to come up with the most ideal stop. In all of the techniques we have done up to this point, we have only done two things at once. In each technique/method we always said “whoa” but we used different means of maximizing our stop. If your horse has done well at all methods, he is ready for you to use all four methods at once. If I’m showing or doing a demonstration, the likelihood of my horse nailing the stop has increased exponentially at this point. We have put ourselves in much better position to succeed and lay down a pretty stop where our horse is sitting down in his hind quarters and taking weight off of his front end. I have found that most horses enjoy stopping when we teach them this method for the simple fact that they know what’s coming and they know what is expected of them. If I have learned nothing else at this point, I have learned that horses thrive on consistency. In this method there’s no yanking or slamming them into the ground. We have put together a great stop that’s done by first saying “whoa” and sitting deeper in the saddle, throwing my legs forward, and finally pulling back with slow hands. The ultimate goal is to not have to pull back at all. In doing so, we have kept our horse’s mouth soft and made each maneuver a little easier to accomplish.
As mentioned earlier, everything we do should be perfected at the walk, then trot, and then finally the lope. If you’re loping circles and your horse isn’t stopping very well, the best thing you can do is rewind in your training and work on stopping at the walk and progress forward. These exercises should be repeated several times before we can really expect our horse to do it exactly the way it needs to be done. If you feel like you can do it at the trot but are having a difficult time at the lope, try these techniques at the extended trot. With the extended trot you have added speed, but haven’t necessary exceeded the level of difficulty your horse is capable of.
For more information contact:
-
Dr. Mark Russell Associate Professor - Equine Extension University of Arkansas Division of Agriculture Cooperative Extension Service 2301 S. University Avenue Little Rock, Arkansas 72204 Phone: (501) 671-2190 Fax: (501) 671-2185 Email: mrrussell@uada.edu
University of Arkansas: Animal Science
Follow us on Facebook: UAEX Animal Science
Livestock and Forage Links
- American Farm Bureau
- American Feed Industry Association
- American Forage and Grassland Council
- American Rabbit Breeders Association
- Arkansas Cattlemen's Association
- Arkansas Farm Bureau
- Arkansas Pork Producers Association
- Arkansas State Fair
- National Cattlemen's Beef Association
- National Pork Board
- National Pork Producers Council
- Agricultural Research Service News & Information, USDA
- Animal & Plant Health Inspection Service APHIS
- Arkansas Agricultural Statistics Service
- Arkansas State Fact Sheets, USDA/ERS
- Bovine Spongiform Encephalopathy BSE, FAS/USDA
- Center for Disease Control CDC
- Food and Drug Administration
- Food Safety and Inspection Service (FSIS) Consumer Publications
- Foot and Mouth Disease, USDA
- National Agricultural Statistics Service NASS
- State of Arkansas
- USA.gov
- US Department of Agriculture USDA