Growing Your Own Irish Potatoes
Contact
University of Arkansas System Division of Agriculture
Cooperative Extension Service
2301 S. University Ave.
Little Rock, AR 72204
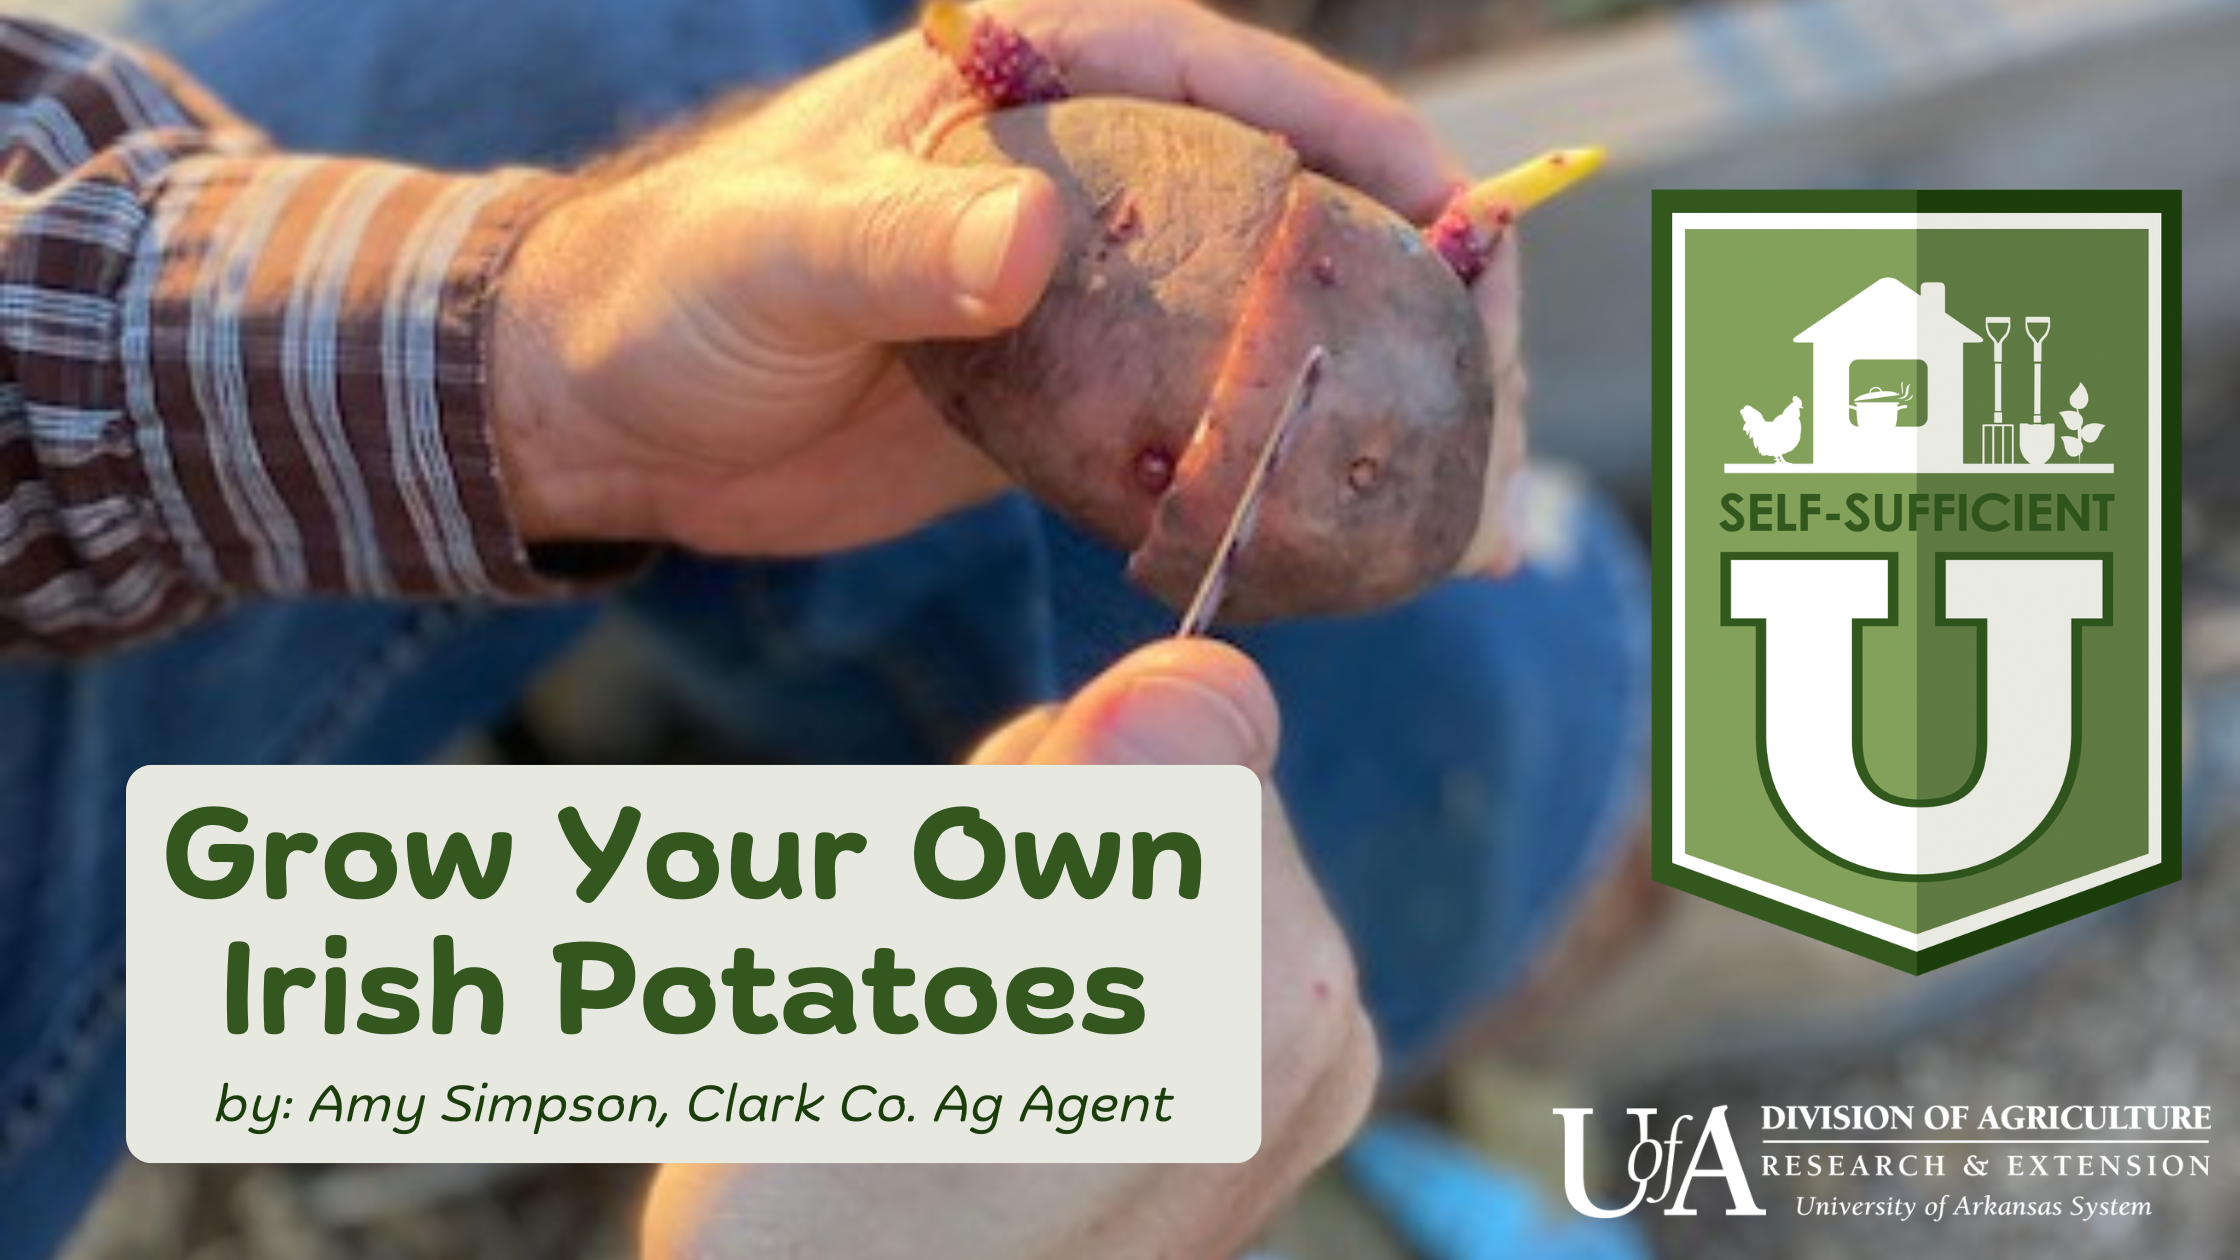
5 Simple Steps to Grow Your Own Irish Potatoes
By: Amy Simpson, Clark Co. Ag Agent
One of my favorite things to plant and grow in the garden is Irish potatoes. Commonly planted in late winter and harvested in early summer, their growing time is perfect for those that would rather avoid working in the hottest summer temperatures. Plus, potatoes are a staple in many kitchens because of the variety of ways they can be prepared. Kids also love helping harvest them since they get to dig in the dirt!
Let’s look at how to successfully grow Irish potatoes in Arkansas:
Step 1: Choose a Potato Variety
First, I’d like to note that Irish potatoes are known for their thin skins. The thicker-skinned russet type potatoes should not be planted in the south. Our weather is too warm and our moisture levels are too inconsistent for them to do well here.
While most Irish potatoes have white flesh and either brown or red skin, there are some interesting varieties with yellow, pink, and purple flesh. Imagine making purple mashed potatoes!
There are early, mid, and late maturing varieties, and they all do well in Arkansas.
The most reliable way to have success growing potatoes is to plant seed pieces, but there are some varieties you can start from true potato seed. Seed pieces are small to large whole potatoes that have been properly stored to induce sprouting. Make sure you purchase certified disease-free seed potatoes. You can usually find these during late winter in farm stores and nurseries. Planting potatoes you have bought from the produce section of your grocery store is not recommended since they are usually treated with chemicals to inhibit sprouting during storage.
Step 2: Prepare the Soil
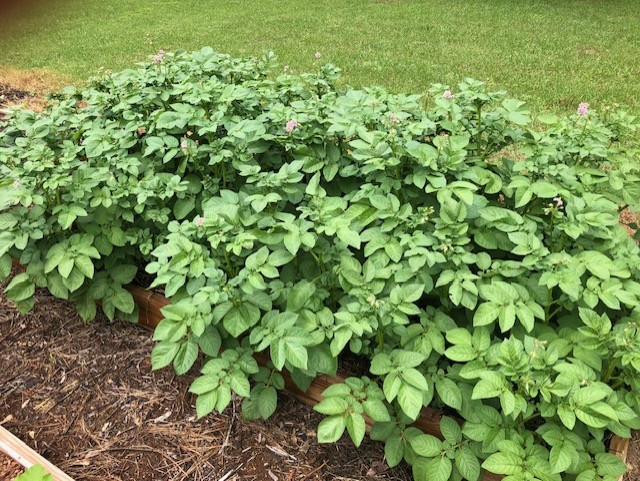
Potatoes need well-drained soils preferably that are fertile and loamy. If you have a more clay-based soil, you can amend it with several inches of compost tilled in, or you could plant in raised beds, large buckets, or one of those potato-growing bags. Some people like to plant potatoes under a thick layer of straw. When my garden was brand new, I didn’t have all my raised beds filled with soil and compost yet when it was time to plant potatoes, so I just cleared out the weeds inside the bed, spaced by seed potatoes out on the ground, and then covered them with about 3” of straw (not hay to avoid grass seed entering the bed). It worked pretty well!
Step 3: Plant Potatoes
In Arkansas, Irish potatoes are planted mid-February through early March in the southern part of the state and early March through early April in the northern part. If you want a fall crop, plant midseason or late varieties mid-July to the first of August.
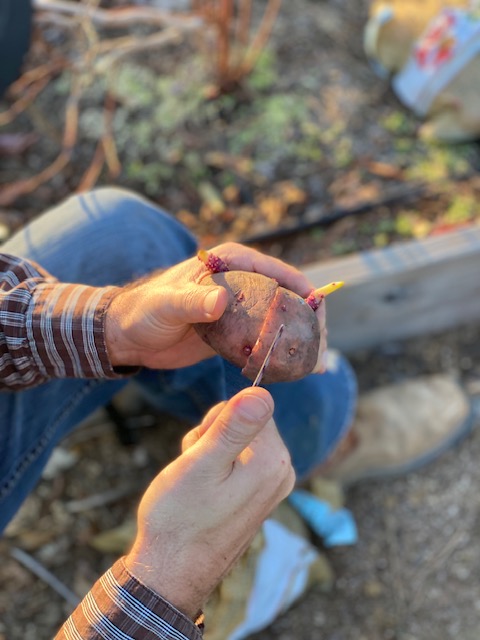
Plant small seed potatoes or large potatoes cut to 1.5-2 ounces pieces with at least 2-3 eyes on each one. It’s generally recommended to let the cut pieces dry for a couple of days at cool temperatures before planting to decrease the chances of rotting, but I have planted them immediately with success. Having a well-drained soil probably helped me there.
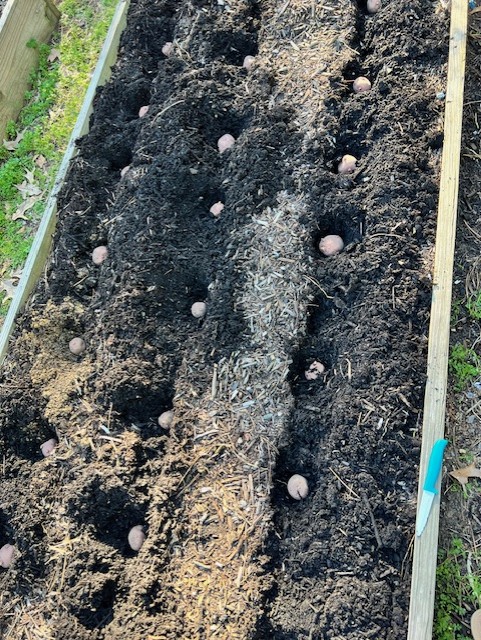
Space your seed pieces 10–12” apart in the row, leaving 24-36” between the rows. Since I garden in raised beds, I use more of a square-foot gardening method. The recommended seed potatoes per square foot ranges from 1-4, but the more you put per square foot, the smaller your potatoes will be. Regardless, I typically use the handle end of a garden rake to poke holes or drag a furrow 2-3” deep, space out my seed pieces with the eyes facing up, then cover them with soil.
Step 4: Care and Maintenance
You will need you to provide care and maintenance for your potato plants as they grow. This includes providing appropriate fertilizer, properly hilling your potato plants, and watering—or irrigation.
Fertilizing Your Potatoes
Potatoes like their nutrients, so they will benefit from the application of a complete fertilizer like 10-10-10. “Complete” means it contains all three of the macronutrients needed by plants. Those are nitrogen, phosphorus, and potassium.
It is recommended to dig a trench six inches on each side of your row, making sure the trench is slightly deeper than the depth you planted your potatoes. In the trenches, apply six pounds of fertilizer total per 100 foot of row, so that would be three pounds per 100 foot of each trench.
Side-dress with another 1.5 pounds of fertilizer per 100 foot of row on each side of the plants once they reach 8-12 inches.
What is "Hilling"?
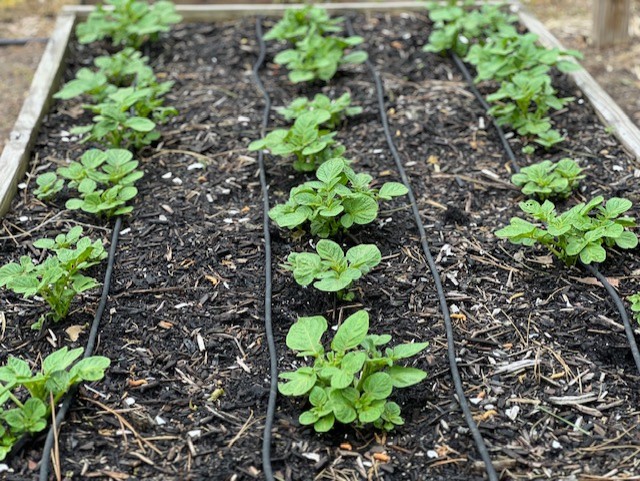
All potatoes that form on the plant will form above the seed piece. Since your seed piece is only 2-3 inches deep, it is important to regularly “hill” the plants or use 4-6 inches of mulch to protect the formed potatoes from sun exposure. When exposed to the sun, the potatoes will develop a green skin, which contains a bitter tasting alkaloid that shouldn’t be eaten.
To hill the potatoes, use a garden hoe to cultivate and drag soil from between the rows to cover the base of the plant once the plant is about 6 inches tall. Continue doing this throughout the growing season. You will end up with a ridge that is several inches tall by harvest.
Irrigation
Irrigate to provide good soil moisture throughout the season. Uniform moisture helps keep the soil cool and prevents problems like cracks and knobs. If you have sandier soil, then you will need to irrigate more frequently than someone with a more clay-based soil. Watering at the ground level with drip tubing or soaker hoses helps reduce disease chances because it keeps the leaves drier, and mulching will help conserve soil moisture and keep the soil cooler.
Step 5: Harvest Your Potatoes
You can start harvesting the smaller “new” potatoes once you notice the plants start to bloom. They are located closest to the soil surface. You can carefully lift and remove them without disturbing the larger potatoes developing below. For larger potatoes, harvest once the vines have died back, or when the frost damages the vines for fall potatoes.
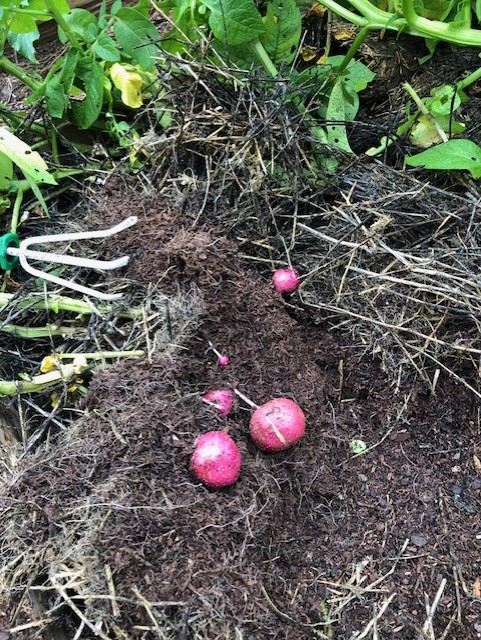
Use a spading fork or a shovel to gently lift the plants without damaging the potatoes. This can be hard to do, and we usually have a few casualties.
Allow the potatoes to dry by spreading them out, preferably in a shady or semi-shady area. Remember, we want to minimize sun exposure. Once dried, put them in a container that has good air flow like a crate or laundry basket and store them in a dark, cool place. Under proper conditions, the potatoes can last for several months.
Bonus: Common Potato Problems
During the growing season, be on the lookout for insects and diseases that can reduce your yields or even kill your potatoes.
Above-ground insects like the Colorado potato beetle, flea hoppers, and leafhoppers can defoliate your plants, while under-ground insects like wireworms and white grubs can eat and bore holes into your potatoes.
Serious diseases like early and late blights, verticillium and bacterial wilts, and scab could potentially move in and seriously reduce yields.
As with many things, the best offense is a good defense. Reduce stress on your potatoes and make them vigorous and healthy through planting in well-drained soil, irrigating at ground level and consistently (as needed), mulching, and fertilizing. Also, practice crop rotation. This will help keep pests that plague certain vegetables from building up in any one area of the garden.
If you do experience any problems with your potatoes, contact your local county extension agent for advice on identifying and treating the problem.
Enjoy your home-grown Irish potatoes and have fun growing this popular side-dish of many kitchens around the world!