Self-Sufficient U Blog
Contact
Clark County Extension Service
Amy Simpson, Horticulture
Cindy Ham, 4-H and Ag
JoAnn Vann, Family & Consumer Sciences
Phone: 870-246-2281
Email: clark-arkadelphia@uada.edu
Follow us on
Facebook
Clark County
Cooperative Extension Service
640 S 6th Street Suite B
Arkadelphia, AR 71923
Easy Guide to Growing Onions in the South
By: Amy Simpson, Agriculture County Extension Agent, Clark County
Ever wondered why your onions just won’t grow like the pros’?
 If you are like me, you cook with onions on a regular basis. They just add so much
flavor to lots of dishes. Roasts, casseroles, salsa, hamburgers and many other recipes
are elevated by the addition of chopped or sliced onions or onion power. Side note,
if you are interested in learning how to make your own onion powder, go read JoAnn’s
blog on preserving onions here.
If you are like me, you cook with onions on a regular basis. They just add so much
flavor to lots of dishes. Roasts, casseroles, salsa, hamburgers and many other recipes
are elevated by the addition of chopped or sliced onions or onion power. Side note,
if you are interested in learning how to make your own onion powder, go read JoAnn’s
blog on preserving onions here.
I just ordered my onion transplants to plant in late February here in south Arkansas, so it’s on my mind to share with you some tips on how to be successful growing onions in the southern garden.
Let’s look at four important things to consider:
1. Select your onion varieties based on day length.
Onions are sensitive to daylight hours, and this affects when they switch from leaf growth to bulb growth as the days get longer moving into summer. Varieties need a specific number of daylight hours for a series of days to start the process of bulb production.
Understanding Day-Length Categories
Onion varieties are divided into three day-length categories:
- Short-day
- Intermediate-day
- Long-day.
The short-day varieties are the ones suitable for those living in the far south of the United States. The closer to the equator you are, the shorter your summer days are compared to those north of you.
Intermediate-day onions are for those more in the middle latitudes of the United States, and the long-day varieties are for those in the upper latitudes.
According to most onion-growing maps, both short-day and intermediate-day onions can be grown in Arkansas.
2. Decide how you want to start your onions.
Onions can be started in three different ways:
- Seeds
- Sets
- Transplants
Starting with Seeds
Planting onion seeds is the least expensive way, but it requires a longer period to develop. You can start seeds indoors in December here in Arkansas. Plant the seeds in trays 1/4-1/2” deep. Keep the soil moist (but not too moist) throughout the winter, and then they should be ready to transplant into the garden in February or March.
Using Sets
Sets are dormant bulbs that can be planted to produce both green and dry bulbs, although many have found they are better for green onions instead of bulb onions because they seem to bolt, or send their flower stalk up, before the bulb matures. This stops growth of the bulb and greatly reduces storage time of the bulb. Many box stores and garden centers will have bags of these available to purchase. The problem is, most of the time they are not labeled with what variety they are or what their day-length requirement is, and sometimes the big box stores don’t necessarily carry what is best for our area. You run the risk of purchasing long-day sets in this case, which would not bulb up here.
If you do plant sets, the smaller bulbs in the bag will grow into larger onions, and the larger bulbs will be best for green onions. Sounds counter-intuitive, I know.
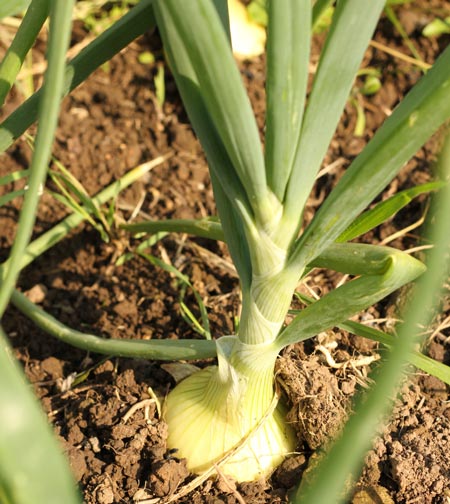
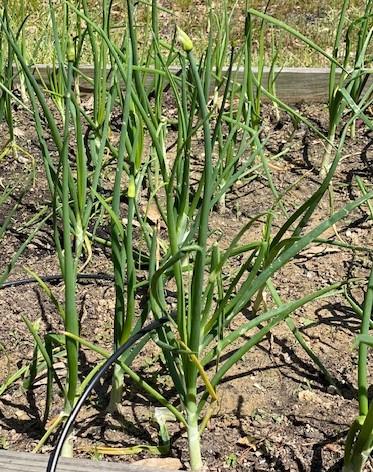
Why Transplants Might Be Best
![]() Transplants are what I personally use in my garden because I don’t want to babysit
seedlings throughout the winter, and I don’t want to run the risk of not planting
the right day-length type.
Transplants are what I personally use in my garden because I don’t want to babysit
seedlings throughout the winter, and I don’t want to run the risk of not planting
the right day-length type.
You can purchase transplants in bundles from online retailers, farm stores, and garden centers. Purchasing online gives you more varieties to choose from. However, I would recommend ordering in the fall before they sell out of the varieties you want. Don’t worry, they won’t ship them to you until it’s time to plant. You’ll find bundles of transplants in stores when it’s time to plant in late winter.
For larger bulbs, plant 4-5” apart and allow 12-15” between rows. Set the transplants 1-1.5” deep, making sure not to cover the youngest leaf.
I don’t want to put the cart before the horse, though. Let’s not forget about soil prep and fertility. I’ll talk about that in the next section.
3. Soil Prep, Fertility, and Care
Onions require a well-drained, full-sun location to grow well. If your garden is not well-drained and has poor soil, incorporating about 3-4” of compost and maybe some rice hulls to improve the soil structure will help. Also, onions do best in either a raised bed or when a row is pulled to about a 4-5” height to plant them in a traditional garden.
Consider Getting Your Soil Tested!
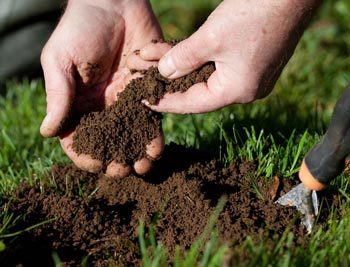 If you haven’t pulled a soil sample in a few years, the fall is the best time to do
that. Onions grow best in soils with a pH of 6.0-7.0. If your soil is too acidic (and
many are in my area), adding the lime recommended from your soil report now would
give it the several months it needs to raise the pH in your garden soil.
If you haven’t pulled a soil sample in a few years, the fall is the best time to do
that. Onions grow best in soils with a pH of 6.0-7.0. If your soil is too acidic (and
many are in my area), adding the lime recommended from your soil report now would
give it the several months it needs to raise the pH in your garden soil.
We offer free soil testing for Arkansans!
Check out our publication for information on
how to pull a soil sample.
Fertilizing Tips
Onions are heavy-feeders, so being consistent with your fertilizer is also key to producing those large bulbs. At planting, dig a 3-4” trench between the rows. In that trench, apply ½ cup per 10 feet of row of a complete fertilizer with the middle number being higher than the other two. A complete fertilizer is one that includes nitrogen, phosphorus, and potassium. The phosphorus percentage is represented by the middle number on the bag. For example, a fertilizer like 10-20-10 would be a good option.
Cover the fertilizer up with a couple of inches of soil. Continue to fertilize in that trench with a nitrogen source every 3 weeks until bulbs start to grow. Examples of nitrogen fertilizers are ammonium nitrate, urea, and blood meal, which is an organic option.
Managing Pests and Diseases
Using a fungicide regularly throughout the growing season will help prevent diseases and rot during storage. Also be on the lookout for insects like thrips and treat accordingly.
Because onions are shallow rooted, they do not compete well with weeds. Hand-weeding and shallow hoeing will be needed throughout the growing season.
Irrigation Tips
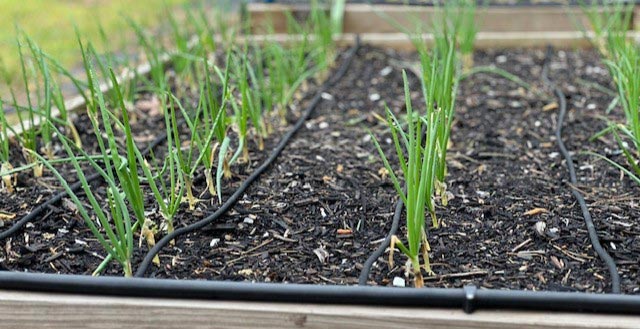
Irrigation is important, and I find drip irrigation to be the best and easiest method. For a quick video on how to get started with drip irrigation, check out my COVID-era YouTube video here:
Alternately you can use a soaker hose to keep the water at the soil line. Watering overhead is not ideal because it can lead to fungal diseases. If you use it, be sure to water in the mornings, so the foliage has time to dry before going into the night.
Over-watering can be as much of an issue as under-watering, so be sure to stick your finger into the soil about an inch deep before you water. If you can still feel moisture at that depth, then don’t water at that time.
Reasons for Bolting
Sometimes you may have onions “bolt” or send up a flower stalk. This is usually caused by temperature fluctuations from warm to cold. If this happens, go ahead and harvest and use those onions because they will rot quickly in dry storage. You can use them fresh or process and preserve them as JoAnn wrote in the blog linked above.
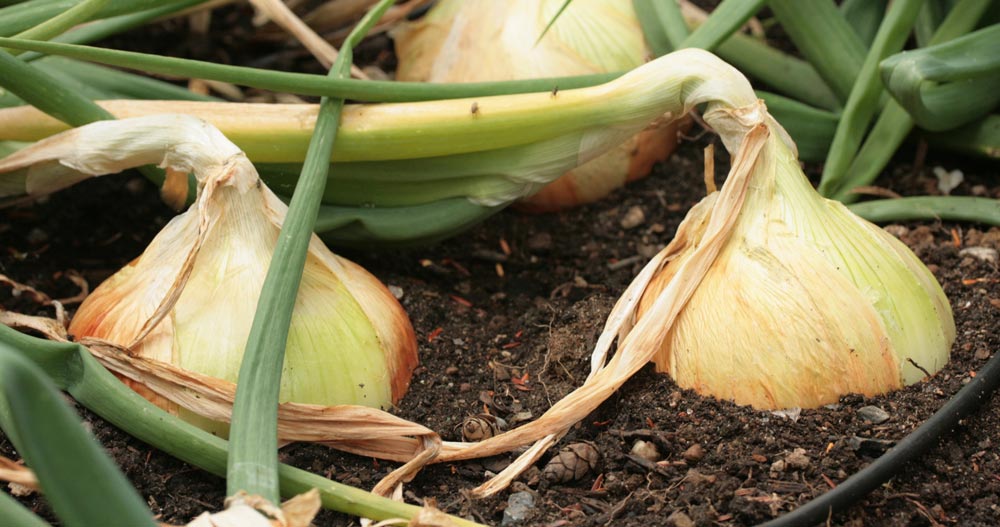
4. Harvest, Curing, and Storage
Harvest green onions when the tops are 6” tall.
For bulb onions, when the tops start to dry and a quarter of them have fallen over, stop watering. Harvest your onions within that week.
Tips for Curing Your Onions for Longer Shelf Life
Keep the tops on them and allow them to dry in a shady area with good airflow. I use by back porch for this, but you may have a shed, a carport, or some other suitable area. There are many ways to DIY a cheap onion drying rack to keep them separated and to allow that airflow to move around them during the drying process. You can also leave them in the garden to dry, but I would use the leaves to cover the bulbs for sunscald protection. I usually let mine dry for about a week.
Storage Options
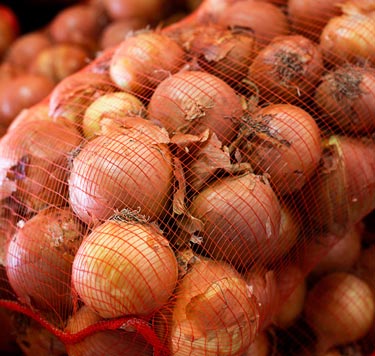 Then you can cut the tops off to about 2” and store. If you have avoided neck and
stem rot, and you store them in a warm (72 degrees F), dry location, you can have
a dry onion supply for months. Storing them in something that allows free movement
of air around the onions, like hanging mesh bags or even hosiery with a knot tied
between the onions is a great way to prolong your dry onion supply.
Then you can cut the tops off to about 2” and store. If you have avoided neck and
stem rot, and you store them in a warm (72 degrees F), dry location, you can have
a dry onion supply for months. Storing them in something that allows free movement
of air around the onions, like hanging mesh bags or even hosiery with a knot tied
between the onions is a great way to prolong your dry onion supply.
Onions are one of my favorite things to grow, and I know they will get used in my kitchen. I hope this helps you feel confident in growing your own onions. Try it and see. Becoming a successful gardener is a process and we learn as we experience.
As always, reach out to your local county extension agent if you have questions!