Ornamental Gourds
 Gourds have been cultivated for thousands of years and were used as utensils, storage
containers and instruments. While once a utilitarian item, they are now showing up
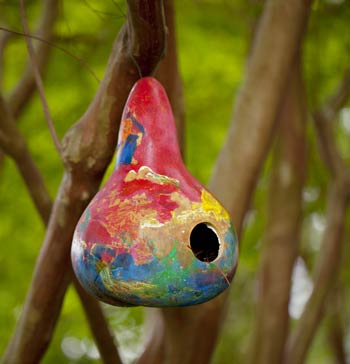
in painted crafts, birdhouses, or scattered around with pumpkins and mums for fall
décor.
Gourds have been cultivated for thousands of years and were used as utensils, storage
containers and instruments. While once a utilitarian item, they are now showing up
in painted crafts, birdhouses, or scattered around with pumpkins and mums for fall
décor.
Gourd is the common name applied to a group of plants in the cucurbit family. They are closely related to squash and pumpkins. These warm-season vining plants, produce hard-shelled fruits.
What type of gourd should I grow?
There are three main classes of gourds that are commonly grown.
- Cucurbitas are the ornamental gourds which include a variety of shapes with bright
colored mature fruits. The Cucurbita gourds produce large yellow or orange flowers
that bloom during the day.
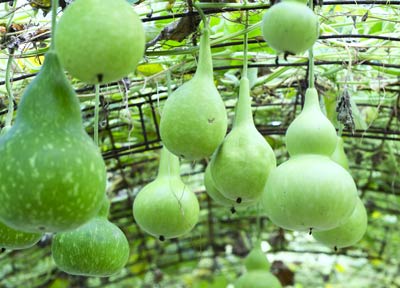
- The Lagenaria gourds are those that encompass the large utilitarian gourds such as
birdhouse, dippers and bottle gourds. The Lagenaria group produces large white blossoms
that bloom at night. The resulting fruit is a light green which turns to brown or
tan as they dry.
- And lastly the luffa’s, or the sponge gourd. The luffas bloom during the day with yellow flowers. They are typically brown at maturity. The outer shell is removed to expose a tough, fibrous interior that is used as a sponge (aka luffa). If harvested when quite small, it is also called vining or Chinese okra, and is edible.
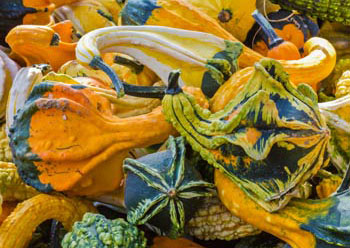
Cucurbitas - ornamental gourds
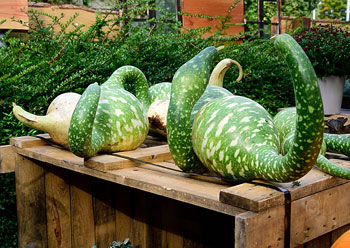
Lagenaria - utilitarian gourds (bottle gourd pictured)
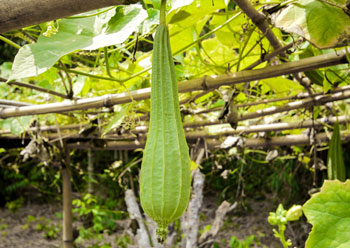
Luffa - sponge gourd
What are the growing conditions for gourds?
All gourds like warm soil, full sun and a relatively long growing period. Wait for all chances of frost to pass before you plant gourds and allow the soil temperature to warm up. Usually, late April to early May is the soonest you should plant, with subsequent plantings up through June or early July.
Gourd vines, like many members of the cucurbit family, are prolific growers. Give them room to grow and spread, or give them a fence or trellis to grow on. For the long club, dipper, and bottle gourds, trellising them will provide straight fruits. Prepare the soil by adding organic matter prior to planting.
Try to have the area as weed free as possible and mulch to prevent grass and weeds or you will have a mess of vines with weeds in them. Mulching is highly encouraged for weed control, but it also helps conserve moisture and keeps the fruits cleaner.
Fertilize with a complete fertilizer at planting and side dress when the vines begin to run. Too much fertilizer will give you more vines and less flowers and fruit.
If you plant your gourds like pumpkins and watermelons in hills, with several seeds per hill, you will need to thin them back to two or three plants per hill after germination. Water is essential to good production, especially when it gets hot and dry. Gourds, like all other members of the cucurbit family, produce separate male and female blossoms, which must be pollinated by insects. They also suffer from the same pest problems as squash and cucumbers–the squash vine borer, squash bugs, cucumber beetles and powdery mildew. Monitor for these pest problems, to control them early.
Most gourds require a long growing period. Usually, a minimum of 90 days up to 180 days is required from seed to harvest. At maturity, the fruits will develop hard, glossy, shells. Know what is expected for the varieties you are growing. They can be smooth or warty, will brightly colored, or white, tan or light green.
When are gourds ready to be picked?
 They are ready to be harvested when the stems dry and turn brown. The stems are usually
quite tough, so harvest with pruning shears, a knife, or scissors to cut them off
the stem. Be sure to leave an inch or two of stem attached, to help them last longer.
They are ready to be harvested when the stems dry and turn brown. The stems are usually
quite tough, so harvest with pruning shears, a knife, or scissors to cut them off
the stem. Be sure to leave an inch or two of stem attached, to help them last longer.
Handle the gourds with care. Avoid bruising, scratching, or puncturing the fruits. If there are any soft spots or blemishes, discard these gourds, or dry them separately. It is best to harvest most of your gourds prior to a frost.
While mature fruits can handle a light frost, colors may be slightly affected, and less developed fruit will be damaged. Gourds benefit from being cured after they have been picked.
How do I cure gourds?
To cure gourds, first start with clean gourds.
- Wash off any soil
- Wipe the fruits with a cloth dipped in rubbing alcohol or dip the gourds into a bath of one part Clorox to nine parts of water. Don’t soak them, just a quick dip.
- Then lay them out so that they aren’t touching each other.
- Periodically turn the fruit to discourage shriveling and promote even curing. If you can provide warmth during this time period, it will speed up the drying and discourage decay.
Those gourds that you want to use for birdhouses, dippers, or as painted crafts, should cure up to three or four weeks depending on the type and size of the gourd. Once they are completely dry, the gourd becomes very light-weight, and you can hear the seeds rattling around inside.
How do I cure sponge gourds?
Luffa or sponge gourds should be harvested when the outer shell is dry. When you can hear the seeds begin to rattle around inside, remove the stem-end, and shake out the seeds from the center cavity. Then you can begin to remove the outer rind.
You can peel the skin or soak the gourds in warm water until the outer skin softens to the point where it can be easily removed, or use running water to help soften the outer skin. Once the sponge is removed, soak it in one part bleach to nine parts water to obtain the creamy white appearance. Rinse it in clear water and dry before using.
By Sherri Sanders
White County Extension Agent - Agriculture
2400 Old Searcy Landing Road Searcy AR 72143
(501) 268-5394
ssanders@uada.edu